
It’s at all times essential to make your app as intuitive as attainable. Nevertheless, for some options, it might be useful to offer additional data to show customers use them successfully. That’s the place TipKit is available in. Launched in iOS 17, TipKit is a framework for displaying suggestions in your app, permitting builders to supply further steerage and making certain customers to take advantage of your app’s options.
On this tutorial, we’ll discover the TipKit framework and see create suggestions for a demo app utilizing SwiftUI.
Utilizing the TipKit Framework
To make use of the TipKit framework, it’s important to first import it into your venture:
import TipKitUnderstanding the Tip Protocol
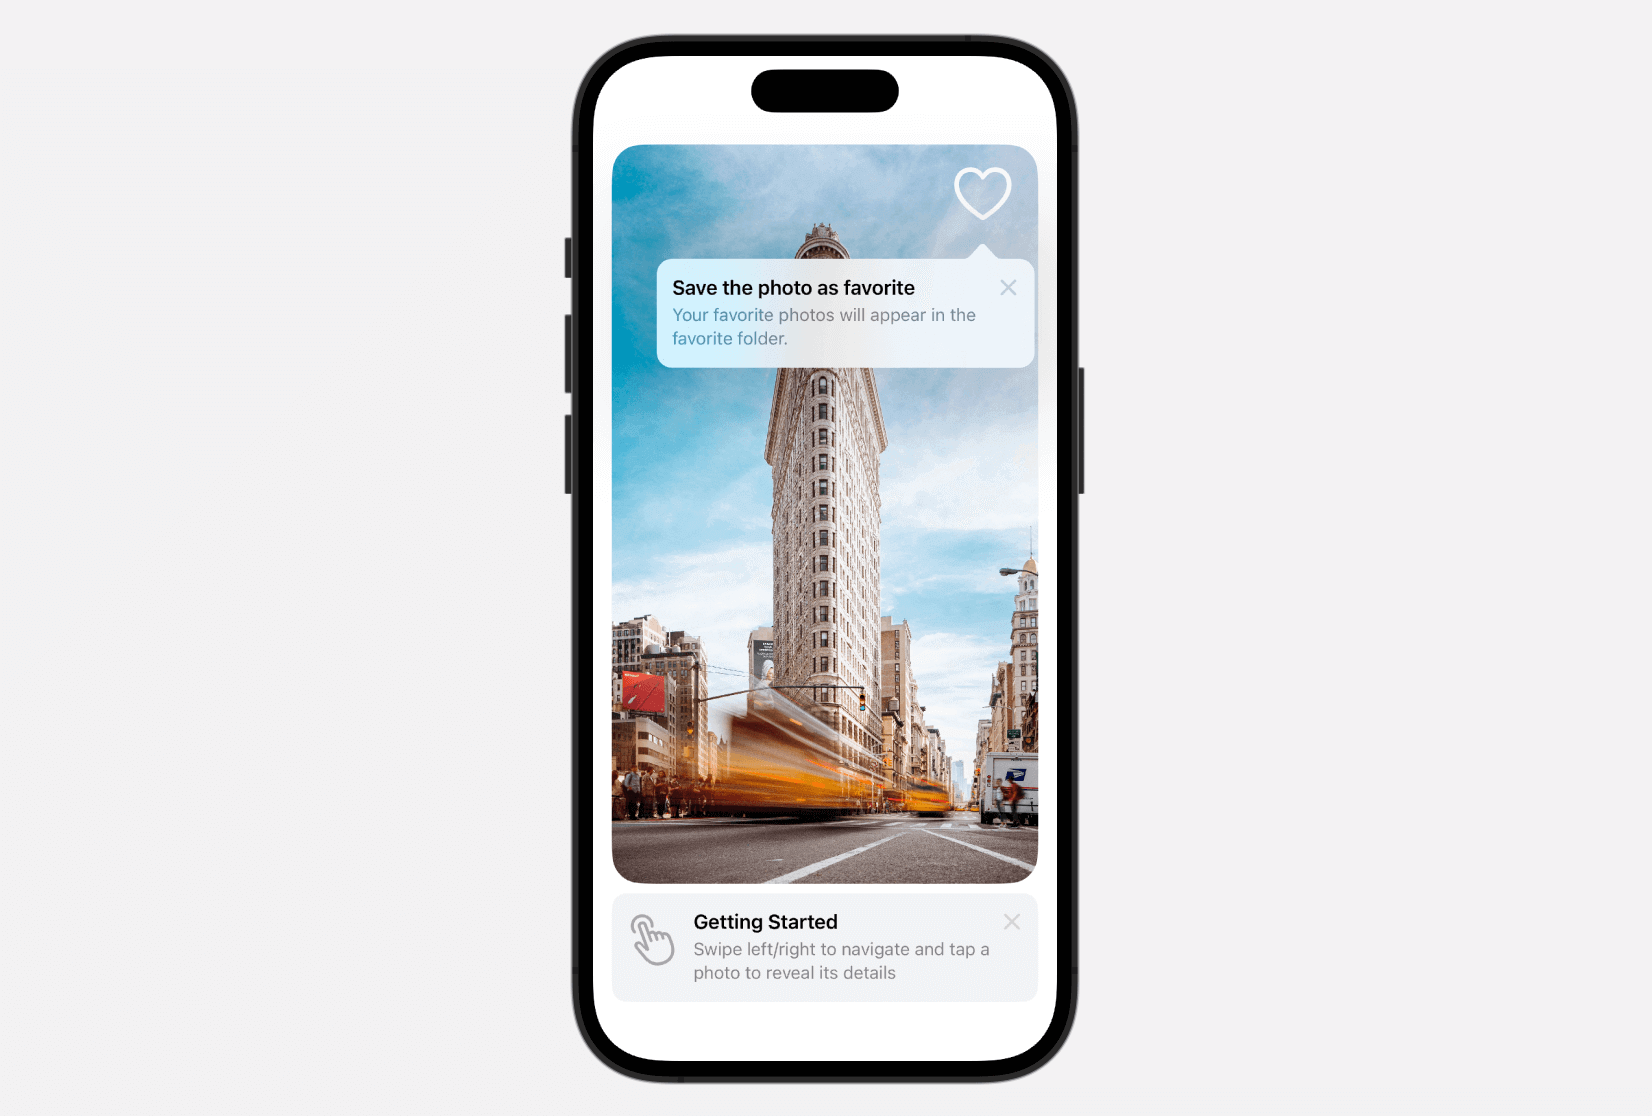
To create a tip utilizing the TipKit framework, you want to undertake the Tip protocol to configure the content material of the tip. Ideas include a title and a brief description. Optionally, you’ll be able to embrace a picture to affiliate with the tip.

For instance, to setup the “Save as favourite” tip, you’ll be able to create a struct that conforms to the Tip protocol like this:
struct FavoriteTip: Tip {
    var title: Textual content {
        Textual content("Save the photograph as favourite")
    }

    var message: Textual content? {
        Textual content("Your favourite pictures will seem within the favourite folder.")
    }
}
If you wish to add a picture to the tip, you’ll be able to outline the picture property:
struct FavoriteTip: Tip {
    var title: Textual content {
        Textual content("Save the photograph as favourite")
    }

    var message: Textual content? {
        Textual content("Your favourite pictures will seem within the favourite folder.")
    }

        var picture: Picture? {
        Picture(systemName: "coronary heart")
    }
}
Displaying Ideas Utilizing Popover and TipView
The TipKit framework supplies the pliability to show suggestions both as a popover or an inline view. Within the popover view, it seems over your app’s UI, which could possibly be a button, a picture, or different UI components. However, the inline view behaves like different commonplace UI components, adjusting its place to suit round different views, making certain that no UI components are blocked.
To point out the tip as an inline view, you’ll be able to create an occasion of TipView and cross it the tip to show. Right here is an instance:
personal let getStartedTip = GetStartedTip()

var physique: some View {
    .
    .
    .

        TipView(getStartedTip)

    .
    .
    .
}
If you wish to show a tip as a popover view, you’ll be able to connect the modifier popoverTip to the button or different UI components:
personal let favoriteTip = FavoriteTip()

Picture(systemName: "coronary heart")
    .font(.system(dimension: 50))
    .foregroundStyle(.white)
    .padding()
    .popoverTip(favoriteTip, arrowEdge: .prime)
To allow the looks of suggestions inside your apps, the ultimate step is to configure the Ideas heart. Assuming your Xcode venture is called TipKitDemo, you’ll be able to swap over to TipKitDemoApp and replace the struct like this:
@primary
struct TipKitDemoApp: App {
    var physique: some Scene {
        WindowGroup {
            ContentView()
                .process {
                    strive? Ideas.configure([
                        .displayFrequency(.immediate),
                        .datastoreLocation(.applicationDefault)
                    ])
                }
        }
    }
}
We will customise the show frequency and the information retailer location by using the configure technique of the Ideas heart. Within the code snippet above, the show frequency is ready to fast, which implies the ideas can be proven instantly. When you want the tricks to seem as soon as each 24 hours, you need to use the .day by day choice. Furthermore, you’ve gotten the pliability to customise the show frequency to any desired time interval, as demonstrated within the following instance:
let threeDays: TimeInterval = 3 * 24 * 60 * 60

Ideas.configure([
    .displayFrequency(threeDays),
    .dataStoreLocation(.applicationDefault)
])
With the Ideas heart configured, it is best to be capable of see the ideas when working the app within the simulator.
Previewing the Ideas
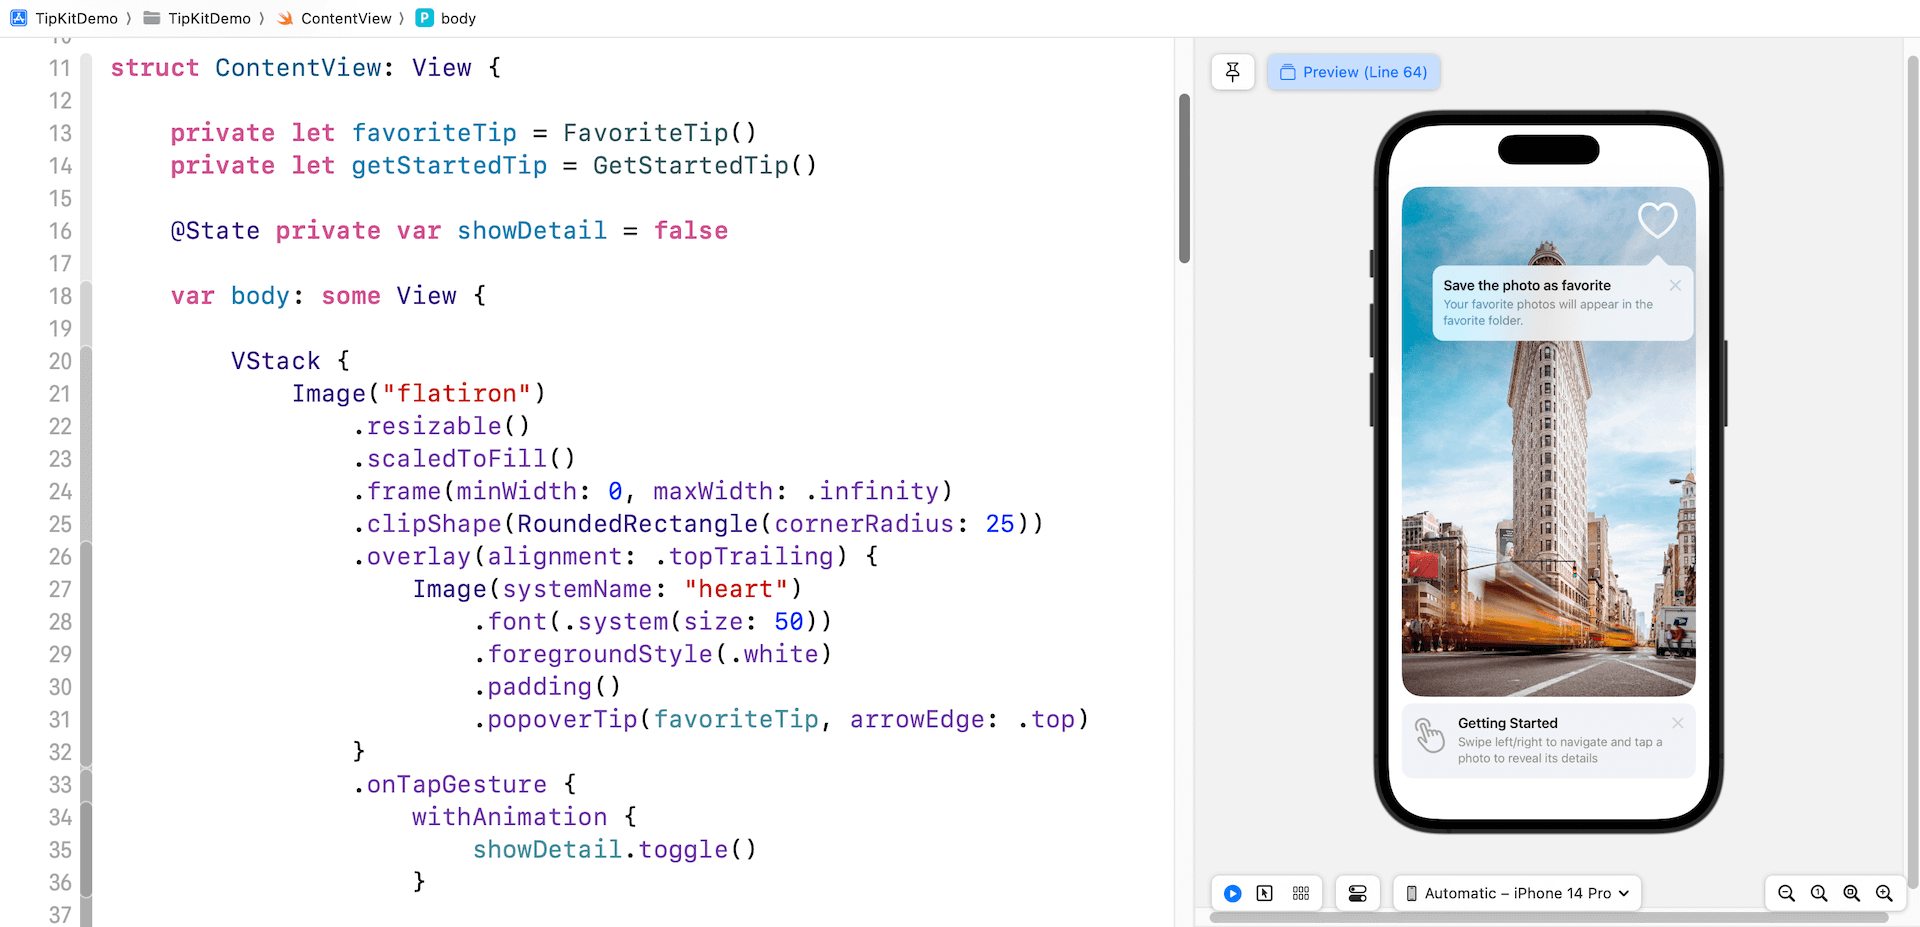
If you wish to preview the ideas within the preview canvas, you additionally must arrange the Ideas heart within the #Preview block. Right here is an instance:
#Preview {
    ContentView()
        .process {
            strive? Ideas.resetDatastore()

            strive? Ideas.configure([
                .displayFrequency(.immediate),
                .datastoreLocation(.applicationDefault)
            ])
        }
}
An essential level to notice is the inclusion of an additional line of code for resetting the information retailer. As soon as a tip is dismissed, it received’t be displayed once more within the app. Nevertheless, relating to previewing the app and making certain that the ideas are persistently proven, it’s endorsed to reset the information retailer.
Dismissing the Ideas
Customers have the choice to dismiss a tip by tapping the X image. If there’s a must dismiss the tip view programmatically, you’ll be able to make the most of the invalidate technique and supply a selected motive as demonstrated under:
getStartedTip.invalidate(motive: .actionPerformed)The explanation actionPerformed implies that the person carried out the motion that the tip describes.
Specifying Show Guidelines
The Tip protocol has an non-obligatory property so that you can set tup the show guidelines of the tip. It helps two forms of guidelines: parameter-based and event-based. Parameter-based guidelines are perfect for displaying suggestions primarily based on particular Swift worth sorts. However, event-based guidelines allow you to outline actions that should be fulfilled earlier than a person turns into eligible to obtain a tip.
For example, the favourite tip ought to solely be displayed after the “Getting Began” tip. We will arrange the parameter-based rule like this:
struct FavoriteTip: Tip {

    var title: Textual content {
        Textual content("Save the photograph as favourite")
    }

    var message: Textual content? {
        Textual content("Your favourite pictures will seem within the favourite folder.")
    }

    var guidelines: [Rule] {
        #Rule(Self.$hasViewedGetStartedTip) { $0 == true }
    }

    @Parameter
    static var hasViewedGetStartedTip: Bool = false
}
Within the code above, we introduce a parameter known as hasViewedGetStartedTip utilizing the @Parameter macro, initially set to false. The guidelines property incorporates a rule that validates the worth of the hasViewedGetStartedTip variable, indicating that the tip must be displayed when the worth is true.
When the picture is tapped, the “Getting Began” tip is dismissed. In the identical closure, we are able to set the worth of hasViewedGetStartedTip to true.
.onTapGesture {
    withAnimation {
        showDetail.toggle()
    }

    getStartedTip.invalidate(motive: .actionPerformed)

    FavoriteTip.hasViewedGetStartedTip = true
}
Upon launching the app, solely the “Getting Began” tip is displayed. Nevertheless, when you faucet the picture to dismiss the tip, the app then presents the “Favourite” tip.
Abstract
On this tutorial, we lined the TipKit framework obtainable on iOS 17. It’s a helpful instrument for showcasing hidden app options and educating customers successfully make the most of them. With TipKit, you’ll be able to effortlessly create and show tricks to improve the person expertise. When you discover TipKit helpful, contemplate integrating it into your subsequent app replace for added advantages.
To be taught extra about different SwiftUI suggestions, you’ll be able to take a look at our Mastering SwiftUI e-book.