
Usually once you plug in an exterior onerous drive to your Mac’s USB port you will note it seem on the desktop. You may also see it in a Finder window within the left column beneath Places (or Gadgets in older variations of macOS). If the drive shouldn’t be displaying up in your Mac chances are high it has not been formatted appropriately, has been corrupted, or is defective. Alternatively, you might have set a password for the drive that you should enter earlier than it’s going to join.
We present you the best way to work out whether or not the rationale the exterior drive shouldn’t be mounting in your Mac up is because of an issue with the drive itself, the cable or the port, and the best way to resolve the issue and entry information in your drive.
PROMOTION
EaseUS | Examine and handle onerous drives on Mac
Why the onerous drive shouldn’t be displaying up in your Mac? get it fastened rapidly? No worries. EaseUS Partition Grasp for Mac is available in. To examine and discover onerous drives each inner and exterior, it scans the units, offers a transparent overview, and diagnoses what occurs to your disks. Along with offering a transparent consequence, it additionally prompts and guides you to take the subsequent step, rapidly fixing your disk drawback, like disk formatting, making a boot disk, and changing the disk to be initialized. Now 25% OFF by utilizing code: MACWORLD25.
This text assumes you’ve an exterior drive that ought to hook up with your Mac by way of the USB-A, USB-C, or a Thunderbolt port. When you have a NAS drive that connects over the community then it’s best to learn our article about connecting to a NAS drive.
Why is your onerous drive not displaying up on Mac?
We’ll begin by making an attempt to determine the rationale why your onerous drive isn’t displaying up on the Mac earlier than explaining what you should do to seek out the onerous drive in your Mac. For those who can determine the trigger your ought to have the ability to repair the issue that’s stopping your exterior drive from opening in your Mac.
Broken cable, port or inadequate energy
The primary port of name is at all times to examine that it’s plugged in, however we’re certain you’ve accomplished that. The issue is likely to be with the cable.
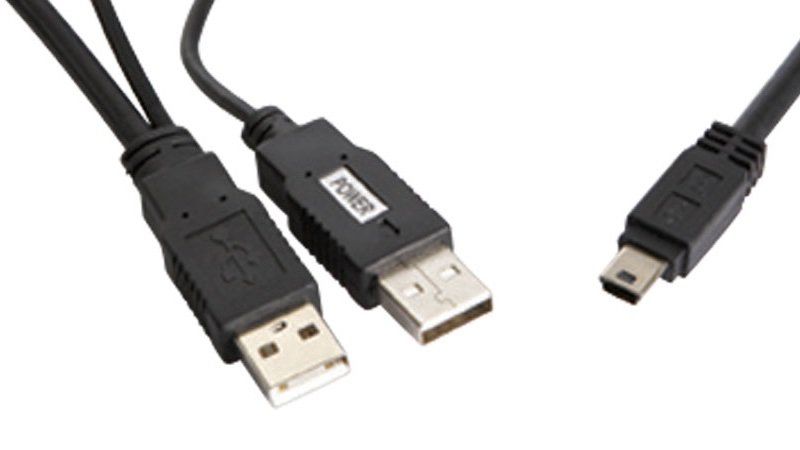
One of many most important explanation why drives fail to mount is that if the drive isn’t receiving sufficient energy. If the drive is powered by way of a USB-A cable you should examine that sufficient energy is being delivered to the drive. Very outdated Macs might require a USB energy cable, a cable that splits into two USB connectors that have to each be plugged into your Mac, with a view to ship sufficient energy to the drive. Equally, make it possible for the drive doesn’t have an exterior energy provide it must be utilizing.
With regards to cables, make it possible for it’s not at fault. Attempt utilizing a distinct cable with the drive to see if that fixes the issue. Equally, in case you are utilizing a USB port on a hub examine that’s not what’s inflicting the issue.
Additionally examine that the port in your Mac isn’t the issue. Attempt utilizing a distinct port. Or when you solely have one port, plug one other machine in and see if that works.
The subsequent step is to strive plugging the drive into one other Mac. If it additionally fails to mount there you’ll know that there’s a drawback with the drive whereas if it does mount then the issue is together with your Mac.
Drawback preferences
Hopefully, there’s a very easy repair to get the onerous drive to mount in your desktop. Attempt the next to ensure your Mac is about to point out mounted drives on the desktop.
- Open the Finder.
- Click on on Finder within the menu on the prime of your display.
- Click on on Settings (Preferences in older macOS variations).
- Click on on Common.
- Make certain that there’s a tick beside Exterior disks.

If it was already arrange in order that the exterior drive would seem on the desktop then proceed to comply with the steps beneath.
Password protections
You possibly can defend a drive with a password once you initially begin utilizing it, so examine to see if the rationale your drive isn’t mounting is {that a} password request field has popped up and also you didn’t discover it.
Generally the password popup takes a couple of minutes to look as effectively, so it helps to be affected person.
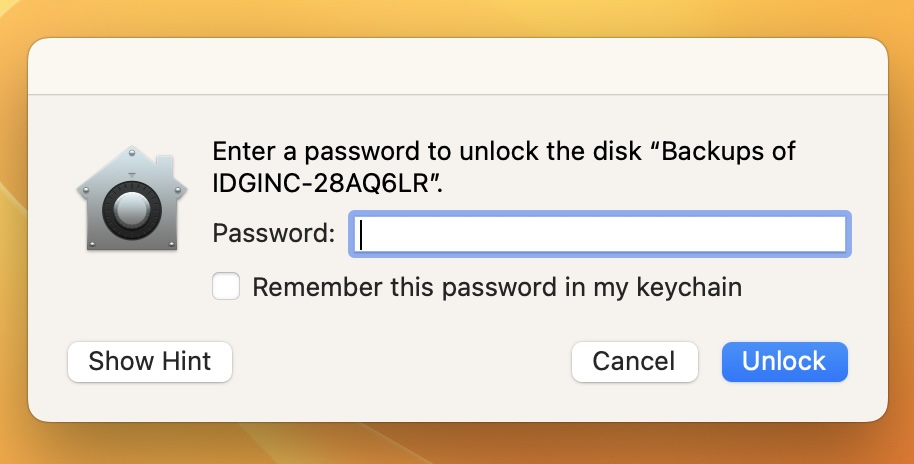
Foundry
The drive is formatted for a PC
It’s potential that the drive has been formatted utilizing a file system that your Mac can not learn.
- Home windows PCs use NTFS or ExFAT file codecs.
- Mac computer systems earlier than Sierra used the HFS+ file format.
- In Excessive Sierra, Apple launched a brand new file system referred to as Apple File System (APFS).
- There may be an outdated FAT32 format may be learn by Window and Mac computer systems, however has limitation on what recordsdata may be saved.
A simple method to discover out if that is the issue can be to examine on a PC. If the drive mounts on the PC it’s doubtless that you’ve found what the issue is: the drive is formatted for PCs and may’t be learn by your Mac. 
To verify your drive may be learn by Macs and PCs you should format it utilizing exFAT or the older FAT32. We’ll clarify how to do this beneath.
It’s a corrupted or defective drive
If not one of the above have been the rationale why you couldn’t see the exterior drive in your Mac, maybe the drive is defective. Whether it is, you should use Apple’s Disk Utility program to entry the disk and probably repair no matter is inflicting the difficulty. We’ll focus on how to do this beneath. We’ll additionally take a look at methods you’ll be able to cease a drive failing sooner or later.
How repair an exterior drive that received’t present up on a Mac
If not one of the above solved your drawback, it’s doubtless the drive is both formatted incorrectly or broken.
Relying on the rationale why you’ll be able to’t see the drive, here’s what you should do to get it working.
reformat a drive so you’ll be able to see it on a Mac
Hopefully, the drive is ok, however the format is improper.
It’s potential that the onerous drive has been formatted utilizing a distinct file system (i.e. on a Home windows PC). In that case, if you should entry the info on the drive you’ll want to attach the drive to a Home windows PC that does acknowledge it and duplicate the info earlier than transferring on to the subsequent step as a result of the method will contain reformatting the drive and deleting all the things on i).
- To verify your drive may be learn by Macs and PCs you should format it utilizing exFAT or the older FAT32.
- If you wish to format the drive to simply be used on a Mac you should use the HFS+ or Apple File System (APFS) file codecs.
Having obtained the info of the drive by way of a PC you’ll be able to reformat the drive so as to add the info once more. Right here’s the best way to reformat your drive so it may be learn by a Mac or a PC.
- Open Disk Utility (as per the steps above).
- For those who don’t require the info on the onerous drive, choose the disk and click on Erase.
- Earlier than Disk Utility begins to erase the disk it’s going to choose a format for you. You possibly can change this when you click on on the Formatting choices. Select your format, ExFAT if you wish to be certain that it’s suitable with PC and Mac, in any other case, Mac OS Prolonged (Journaled) might be the best choice.
- Click on on Erase and wait to your Mac to erase after which reformat the drive.
- Give the drive a reputation.
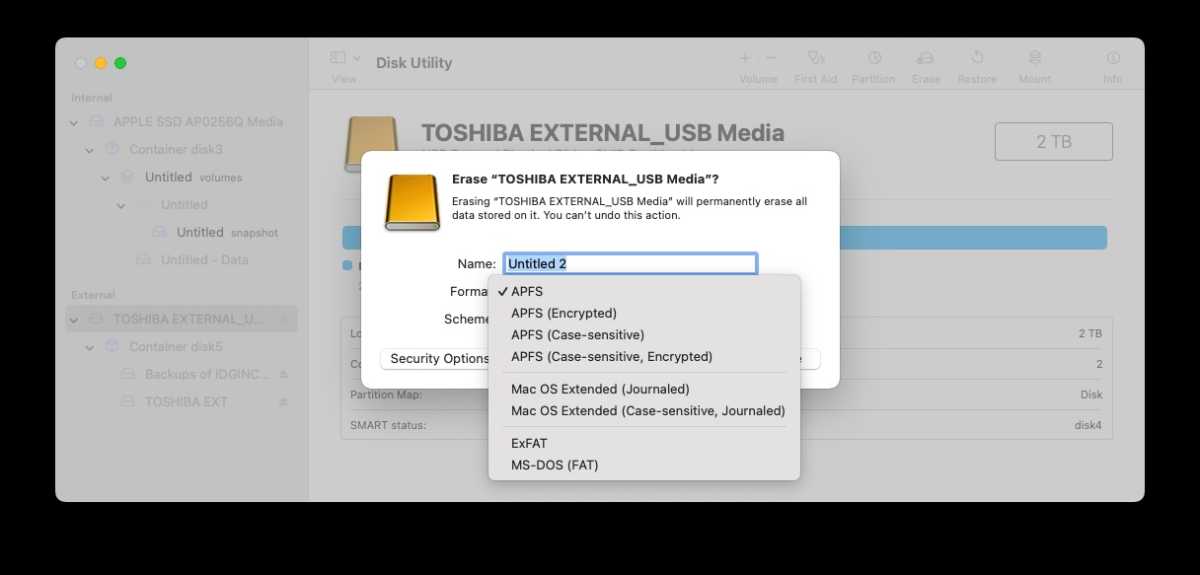
Screenshot
Foundry
Learn extra: format a drive on a Mac.
repair the defective drive with Disk Utility
If the varied checks above counsel that the disk is defective then you should use Apple’s Disk Utility program to entry the disk and probably repair no matter is inflicting the difficulty. Right here’s what to do:
- Discover Disk Utility by opening Highlight (cmd+Area-bar) and begin typing Disk Utility, press enter to open this system.
- Look within the column on the left to see if the onerous drive seems there.
- For those who can see the onerous drive in Disk Utility examine beneath it for a quantity. Whether it is there click on on it and choose Mount. In case your Mac has already mounted the drive the choice Unmount might be displayed as a substitute. (If there isn’t a quantity listed your Mac shouldn’t be capable of entry the drive. The Mount possibility might be greyed out.)

- Your choices are First Assist, Erase, and Restore. First Assist will examine the disk for errors after which restore the disk if obligatory and that is the choice to decide on. Restore means that you can erase the contents of the drive and substitute that with information from some place else. Erase deletes all the info saved on the drive. For those who want the info on the drive don’t select Erase or Restore!
- Click on the First Assist tab and choose Run.

- If after working First Assist the Mac finds errors you could possibly repair you might even see the choice to Restore Disk. For those who do, go forward and run the repairs.
Finest apps to recuperate information on a misplaced drive
In case your Mac is unable to restore the disk if is probably going that the drive is both formatted utilizing a file system that the Mac can not learn, or it’s effectively and actually damaged. If it’s the latter we advise you comply with this tutorial about recovering information from a broken disk. You might also need to contemplate one of many information restoration apps for Mac we suggest in our round-up of the Finest information restoration apps for Macs.
Our suggestions embrace Recoverit from Wondershare, Information Rescue from Prosoft and Stella Information Restoration for Mac.
1. Wondershare Recoverit
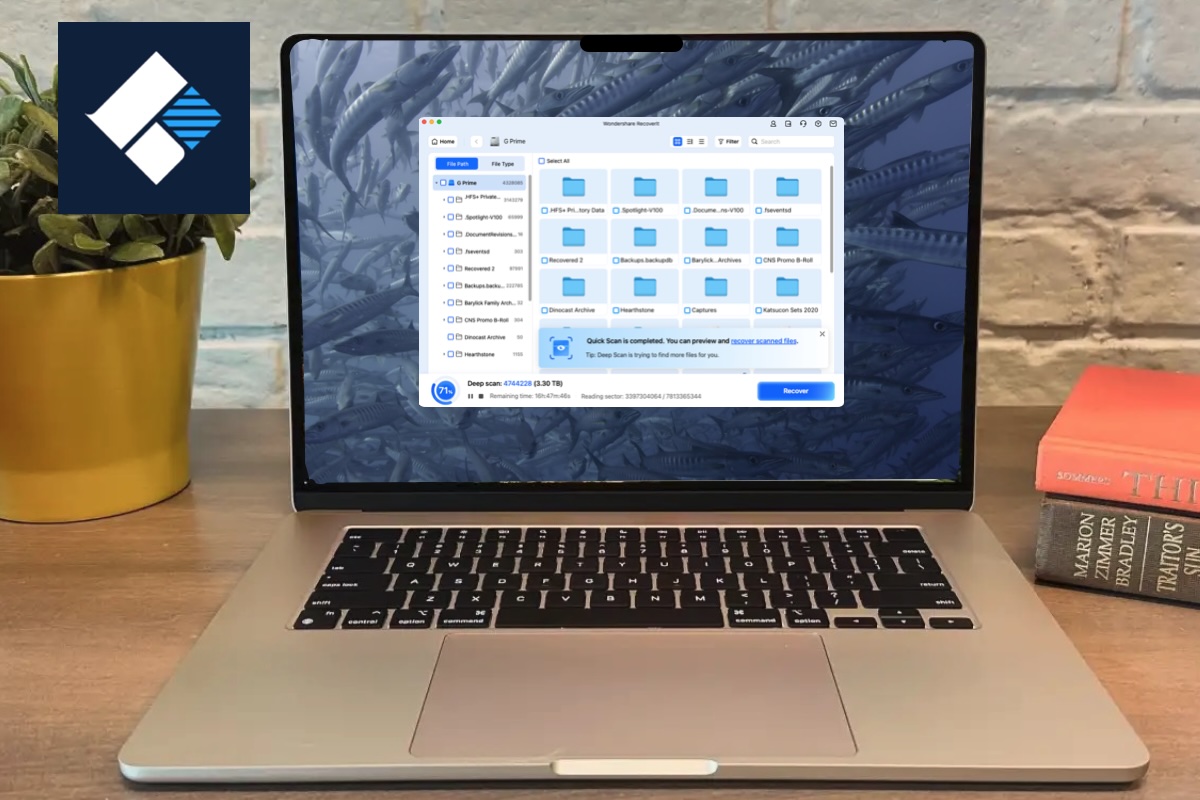
Value When Reviewed:
1 month/2 Macs: $79.99 (normally $109.99); 1 yr/2 Macs: $89.99 (normally $139.99); perpetual license/2 Macs: $139.99 (normally $169.99)
Learn our full
Wondershare Recoverit overview
2. Information Rescue
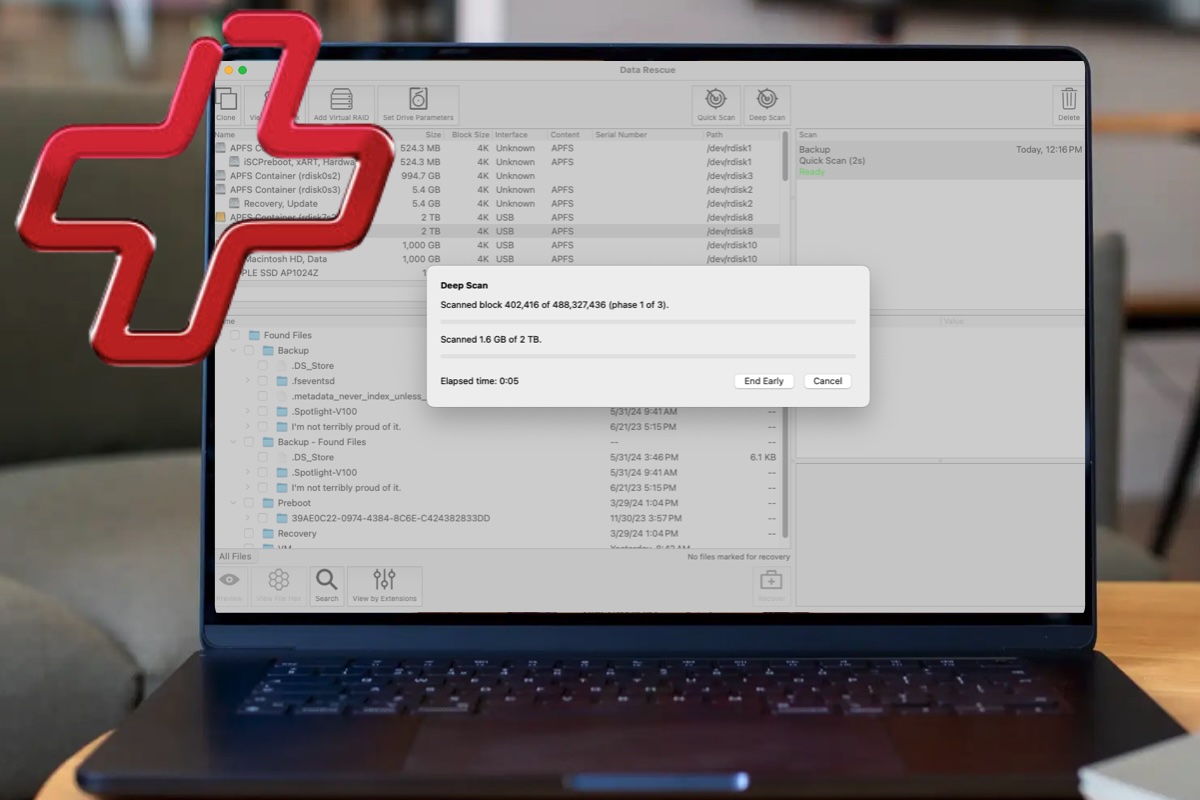
Value When Reviewed:
Commonplace license: $79 for a 30-day; Skilled license: $399 for one yr
Learn our full
Information Rescue overview
3. Stellar Information Restoration for Mac
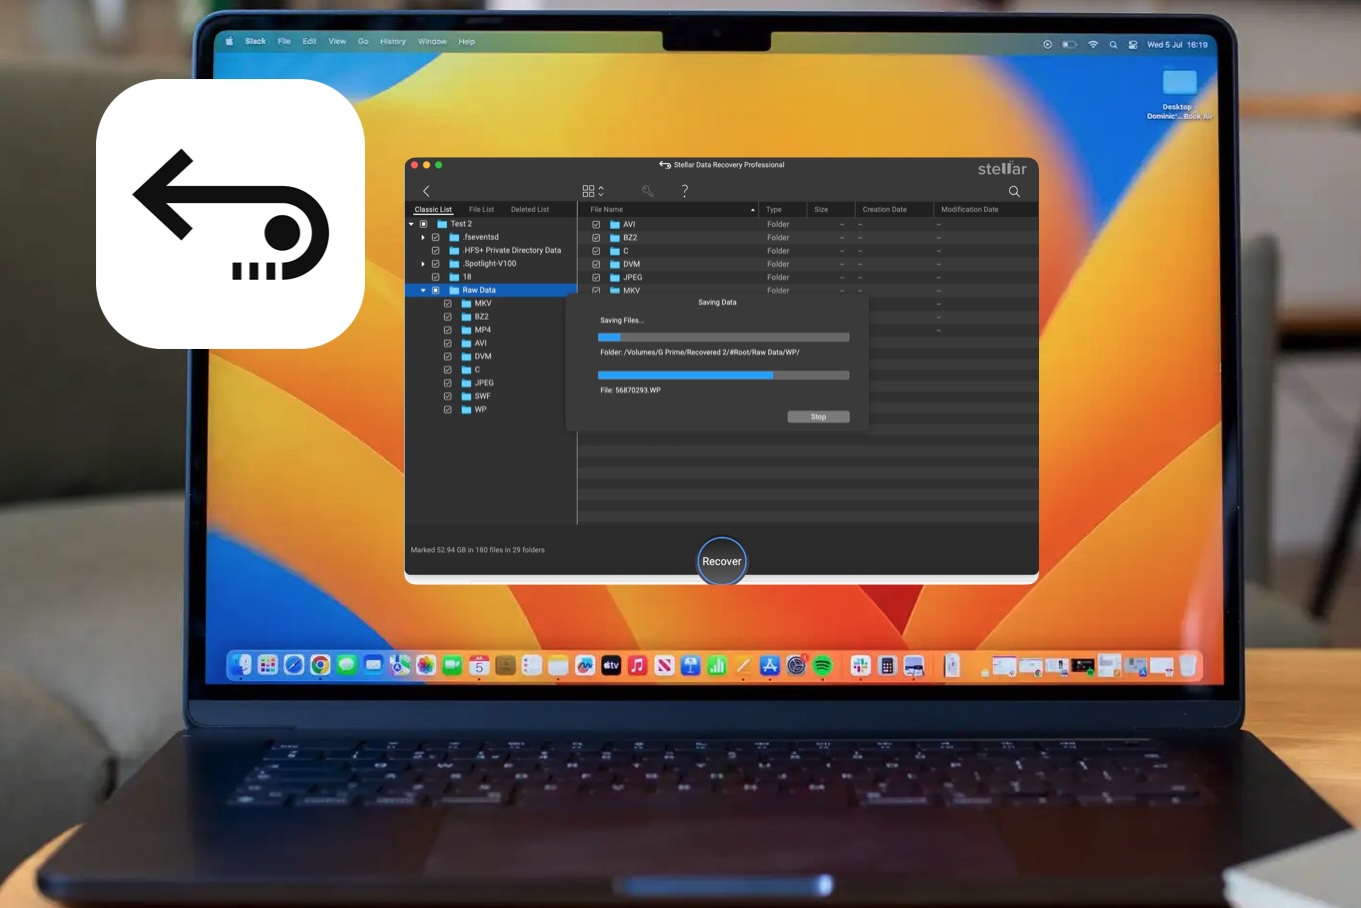
Value When Reviewed:
Commonplace version: $79.99 (presently $69.99) a yr, or $129.99 (presently $99.99) for a lifetime license. Skilled model: $129.99 (presently $99.99) a yr, or $199 (presently $149) for a lifetime license. Premium version: $209.99 (presently $99.99) a yr, or $319 (presently $199) for a lifetime license.
Learn our full
Stellar Information Restoration for Mac overview
forestall points with onerous drives on a Mac
We now have last suggestion to make that’s extra of a guard towards this error taking place once more.
Be sure that your exterior drive doesn’t change into broken sooner or later by at all times unmounting the disk correctly after utilizing it. Don’t simply unplug the USB cable.
To unmount your drive you’ll be able to right-click (control-click) on the icon on the Desktop or within the Finder and select Eject. Drive points can happen when the disk is eliminated with out ejecting it correctly.
Determined there isn’t a hope to your defective onerous drive? We now have a round-up of a number of the finest we’ve seen right here: The very best Mac onerous drives.