
With iOS 18, we’ve got the chance to create mesh gradients. Mesh gradients are a very nice option to create very cool UI results. On this submit, we will discover precisely what mesh gradients are, how we are able to use them, and the way we are able to even animate them to look actually cool.
We’ll begin off taking a look at how we are able to create a mesh gradient. We’re going to try the way it roughly works, after which we’ll additionally take a look at what we are able to animate and the way we are able to play with mesh gradients. On the finish of the submit, I am going to discuss a little bit bit about the place I believe it makes loads of sense to make use of mesh gradients and the place possibly it might be a little bit bit a lot.
Let’s dig in, we could?
Making a mesh gradient
A mesh gradient is a gradient that does not simply go from one colour to a different like an ordinary linear or radial gradient would. It goes by a number of colours in a sort of cloud formation trying method. Let’s take a look at an instance of a mesh gradient down under.
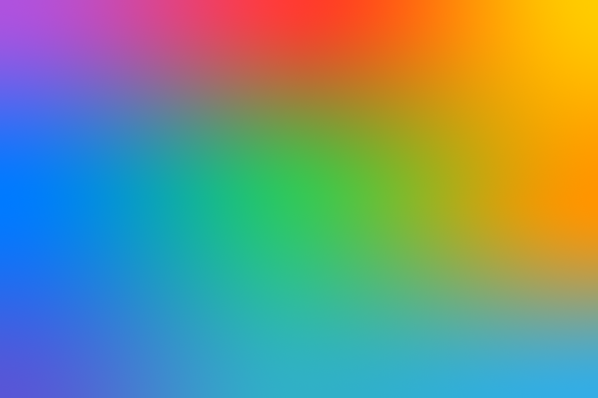
On this image, we are able to see a gradient that makes use of 9 colours to create an fascinating impact the place we go from that purple colour within the top-left to a special colour within the center after which one other colour within the top-right and within the bottom-left, principally permitting us to have totally different colours within the gradient and so they all mesh into one another just like the title mesh gradient suggests.
We will create these gradients in SwiftUI through the use of the brand new mesh gradient object.
A mesh gradient wants a few issues: a width and a peak, which principally inform the mesh gradient the variety of colours that we’ll have on the horizontal and vertical axis.
For instance, we may create mesh gradient that makes use of 4 colours as a substitute of 9. That mesh would have a width of two and a peak of two. This leads to a mesh that has two rows with two columns every. We may additionally make it a gradient that has a width of two and a peak of three, which implies that we will have two columns over three rows, so a complete of six colours.
With a gradient like that, every colour is positioned on the edges of the mesh.
The location of our colours is managed by passing them to the MeshGradient‘s initializer.
Earlier than I clarify additional, I believe it is a good suggestion to try the code that is wanted to create a mesh gradient.
MeshGradient(
    width: 2,
    peak: 2,
    factors: [
        .init(x: 0, y: 0), .init(x: 1, y: 0),
        .init(x: 0, y: 1), .init(x: 1, y: 1),
    ] ,
    colours: [
        .red, .orange,
        .purple, .blue
    ]
)
On this code, you possibly can see that the way in which that we create this gradient is by giving that width and peak that we simply talked about after which an inventory of factors. This record of factors tells the mesh gradient precisely the place within the mesh every colour exists.
So the primary colour on this case exists within the high left (0, 0), after which we transfer to the subsequent level which goes to be high proper which is (1, 0). What’s fascinating to notice is that we specify these positions by columns and rows. So we begin off high left after which the highest proper after which the subsequent one turns into backside left.
The positions we go are at all times values between zero and one, and so they symbolize a relative place throughout the mesh. Irrespective of how giant or small your gradient will get, the gradient goes to know precisely the place all the pieces must be based mostly on our relative positions.
The fourth and final argument which you could see as effectively within the code snippet is colours. colours is an inventory of all the colours that we need to use. So if we’ve got a width of two and a peak of two, then we specify 4 colours. The order of the colours the identical as how our positioning works. So on this case, pink, orange, purple, blue means:
- Pink goes to be high left
- Orange goes to be high proper
- Purple goes to be backside left
- Blue goes to be backside proper
Even when we place the primary colour at one thing like, for instance, the underside proper place the system continues to be going to calculate the gradients as if pink is positioned (roughly) within the high left. Be at liberty to mess around with this a little bit bit your self to see what I imply.
Along with offering entire values like 0 and 1, we are able to additionally present decimal values like 0.5. The end result shouldn’t be at all times precisely aesthetically pleasing as a result of if we, for eg., give our first colour (the pink colour) an x worth of 0.5, the end result appears a little bit bit like this.
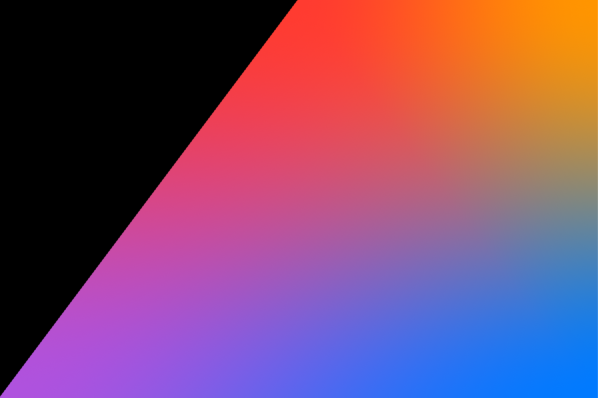
You possibly can see that instantly the gradient types of cuts off, which suggests that there is a straight line drawn from the underside left place all the way in which as much as the place wherever our pink colour goes to be, and we do not actually cowl the world that is remaining. So we’re now left with an enormous hole, and that is not essentially fascinating.
Usually, what you may do is you may have your gradients at all times sit on the corners. If we did need to mess around with a colour within the center, we may really make a gradient grid of 3×3 after which mess around with that center worth. The gradient you noticed at the beginning of this submit might be adjusted a little bit bit and find yourself trying like this:
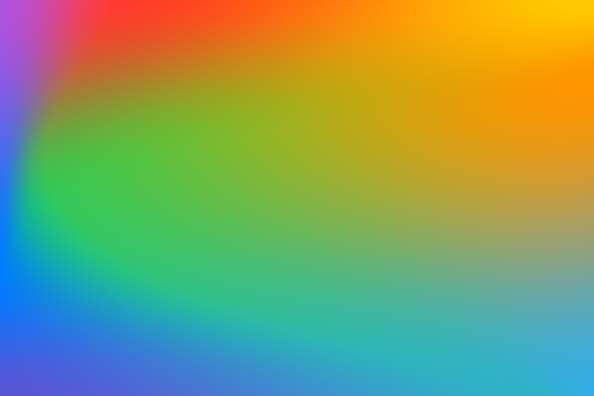
This impact was achieved by transferring round the entire gradient factors besides these on the corners. The result’s an much more fascinating visible impact than the one you noticed earlier.
That brings me to animating a mesh gradient. Let’s go forward and check out that subsequent.
Animating a mesh gradient
We will make our mesh gradients animate utilizing a number of strategies. I will likely be utilizing a timer-based animation right here as a result of that’s what I like to make use of most. When you choose to make use of one thing else, you are fully free to do this, in fact.
Let’s go forward and take a look at the code that creates our animation. You possibly can see it down under. Total, this code would not actually do something fancy. It simply strikes our gradient in a random course inside a scope across the base place. The impact is fairly cool. It sort of appears like there is a highlight going across the canvas. I actually prefer it. It is actually not that onerous to realize, and that is actually the facility of the mesh gradient API.
struct ContentView: View {
    @State var positions: [SIMD2] = [
        .init(x: 0, y: 0), .init(x: 0.2, y: 0), .init(x: 1, y: 0),
        .init(x: 0, y: 0.7), .init(x: 0.1, y: 0.5), .init(x: 1, y: 0.2),
        .init(x: 0, y: 1), .init(x: 0.9, y: 1), .init(x: 1, y: 1)
    ]

    let timer = Timer.publish(each: 1/6, on: .present, in: .widespread).autoconnect()

    var physique: some View {
        MeshGradient(
            width: 3,
            peak: 3,
            factors: positions,
            colours: [
                .purple, .red, .yellow,
                .blue, .green, .orange,
                .indigo, .teal, .cyan
            ]
        )
        .body(width: 300, peak: 200)
        .onReceive(timer, carry out: { _ in
            positions[1] = randomizePosition(
                currentPosition: positions[1],
                xRange: (min: 0.2, max: 0.9),
                yRange: (min: 0, max: 0)
            )

            positions[3] = randomizePosition(
                currentPosition: positions[3],
                xRange: (min: 0, max: 0),
                yRange: (min: 0.2, max: 0.8)
            )

            positions[4] = randomizePosition(
                currentPosition: positions[4],
                xRange: (min: 0.3, max: 0.8),
                yRange: (min: 0.3, max: 0.8)
            )

            positions[5] = randomizePosition(
                currentPosition: positions[5],
                xRange: (min: 1, max: 1),
                yRange: (min: 0.1, max: 0.9)
            )

            positions[7] = randomizePosition(
                currentPosition: positions[7],
                xRange: (min: 0.1, max: 0.9),
                yRange: (min: 1, max: 1)
            )
        })
    }

    func randomizePosition(
        currentPosition: SIMD2,
        xRange: (min: Float, max: Float),
        yRange: (min: Float, max: Float)
    ) -> SIMD2 {
        var updateDistance: Float = 0.01

        let newX = if Bool.random() {
            min(currentPosition.x + updateDistance, xRange.max)
        } else {
            max(currentPosition.x - updateDistance, xRange.min)
        }

        let newY = if Bool.random() {
            min(currentPosition.y + updateDistance, yRange.max)
        } else {
            max(currentPosition.y - updateDistance, yRange.min)
        }

        return .init(x: newX, y: newY)
    }
}
Along with the code, I believe it is fascinating to try the end result, which is proven down under.

Each the impact and the code are fairly easy examples of what we are able to do. There are loads of different methods to realize related, the identical or higher outcomes. So I hope this simply supplies a place to begin for you, in order that you recognize what you are able to do and to encourage you on how you may get began animating your mesh gradients.
There’s not a lot else to say about mesh gradients and animating them.
To discover meshes and animations extra, you may additionally mess around with the factors array and provides it bezier factors as a substitute of plain factors. That will get you extra freedom and lets you change how the mesh gradient interpolates how colours ought to mix. It’s actually laborious to do that effectively, so I am not going to dig into that an excessive amount of.
I believe in case you’re comfy with bezier factors, you are going to have the ability to use this. When you’re not comfy with that like me, it may be rather a lot tougher. So yeah, not going to cowl that one. Now that you’ve got seen animate a mesh gradient, let’s discuss a little bit bit about the place and when it is sensible to make use of them.
The place and when to make use of mesh gradients
Like every UI impact, mesh gradients will be utilized tastefully and correctly, or they are often utilized in a really overbearing method, which principally makes them look unhealthy in your UI. I believe what’s necessary to understand is that mesh gradients do take up loads of visible area from the consumer. So it would not have an effect on that you are going for, they make whole sense. I additionally suppose that sort of is sensible as a background sort of view.
A extremely fascinating impact that I’ve seen is to use a little bit little bit of a frosted overlay over your mesh gradient, which you are able to do through the use of the code under.
MeshGradient(
    width: 3,
    peak: 3,
    factors: positions,
    colours: [
        .purple, .red, .yellow,
        .blue, .green, .orange,
        .indigo, .teal, .cyan
    ]
)
.body(width: 300, peak: 200)
.overlay(.ultraThinMaterial)
When you do this, your gradient will likely be a bit extra muted as proven within the image down under.
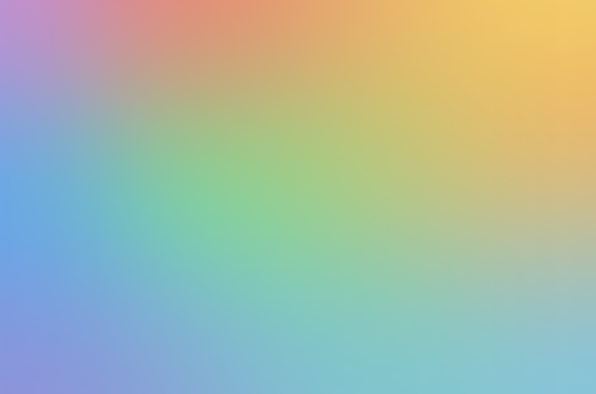
When you apply the impact like that, what occurs is that the mesh gradient turns into much more refined and it actually provides to your UI when used as a background view.
I’d additionally just remember to do not use colours which might be too far aside. If the colours are considerably related, it creates this good unified view, which is much more enticing to have a look at than one thing that may be very out excessive like I did in my instance.
In fact, it will depend on what you are going for. However in case you’re going for one thing extra refined, that is what you need to do.
In Abstract
To summarize what you have realized, on this submit we took a take a look at mesh gradients. We checked out how they’re written. You have seen how one can go an inventory of factors and an inventory of colours to create a mesh gradient rapidly. You have additionally seen that mesh gradients can help you transfer the positions of colours round and the way making too excessive of an adjustment may end up in unusual appears (which possibly are precisely what you are in search of, in all probability not).
You have additionally seen how one can animate your mesh gradients. We wrap up the submit by taking a look at how one can just remember to apply mesh gradients in a tasteful method as a substitute of simply going all in with them and going completely overboard with one thing that is going to be method an excessive amount of.
I believe MeshGradient goes to have the ability to make some actually cool UI results. And I am really trying ahead to apps implementing this as a result of I’d like to see how they make good use of this new API on iOS 18.